
Same Thing Game
Perhaps the greatest lesson plan in the history of second language teaching? You be the judge.
For the study of any second language, this activity focuses on practicing prepositions of location and vocabulary related to spatial relationships. It also supports the development of communicative skills, such as giving and receiving instructions, using polite language, and negotiating meaning. With a little creativity and effort, however, teachers or students can find many additional uses for this activity and its resources.
First, the teacher or students explain how to make a classic origami box, butterfly, balloon, and a few other simple shapes. For homework, each student can prepare to teach the folding method for one origami, or the teacher can teach everyone how to fold the different shapes at the beginning of class. Alternatively, everyone can watch an online instructional video together, but these videos are not always available in the target language. Also, the students need to be studying prepositions of location, and if possible, language for giving instructions or asking politely for something.
In groups of 2 to 4 students, one student at a time is chosen to be the builder, and this student cannot view the image and must listen carefully to his/her teammates’ instructions to learn where to move and place the different origami shapes. Naturally, only this one student builder can touch and move the origami shapes around, and his/her teammates can view the image but cannot touch the origami. All students in the group, including the builder, should be using language to communicate during the task, using dialogue to confirm where everything should be located.
The students take turns so that everyone has a chance as builder as they practice creating different arrangements of the origami shapes. After practicing for 10 to 20 minutes, the groups can race to see who can create the arrangement in the fastest time, or the groups can race to see who can create the most similar arrangement in a limited amount of time.
Each arrangement includes 8 different origami shapes: two boxes, two beams, one butterfly, one balloon, one building, and one blanket (for ESL, just for fun, everything starts with a “B”, but teachers and students can call these by any name). Thus, each group needs two origami “masu boxes,” two origami beams, one origami butterfly (the most traditional one), one origami balloon, one origami building, and one origami blanket. There are three colors used: Yellow for one beam, one box, and the building; Red for the balloon and the blanket; Blue for one beam, one box, and the butterfly. The colors can play a role in the giving of instructions, but the activity still works with any colors of paper (just ask the students to ignore the role of color when doing the activity). For this activity, I recommend using origami paper that is close to the standard size, 15cm by 15cm (about 6in by 6in). No gluing or cutting is required. The activity can be carried out in various ways, but each group will need a set of the 8 origami shapes listed above, and you may want to use a slightly sturdier origami paper, such as craft origami paper.
- The Masu Box, Balloon, and Butterfly are quite famous, and instructions can be found easily online. These are all famous and traditional models.
- The Building and Beams are unique to this activity, and the instructions for these can be found below.
- The Blanket is simply an unfolded piece of square origami paper.
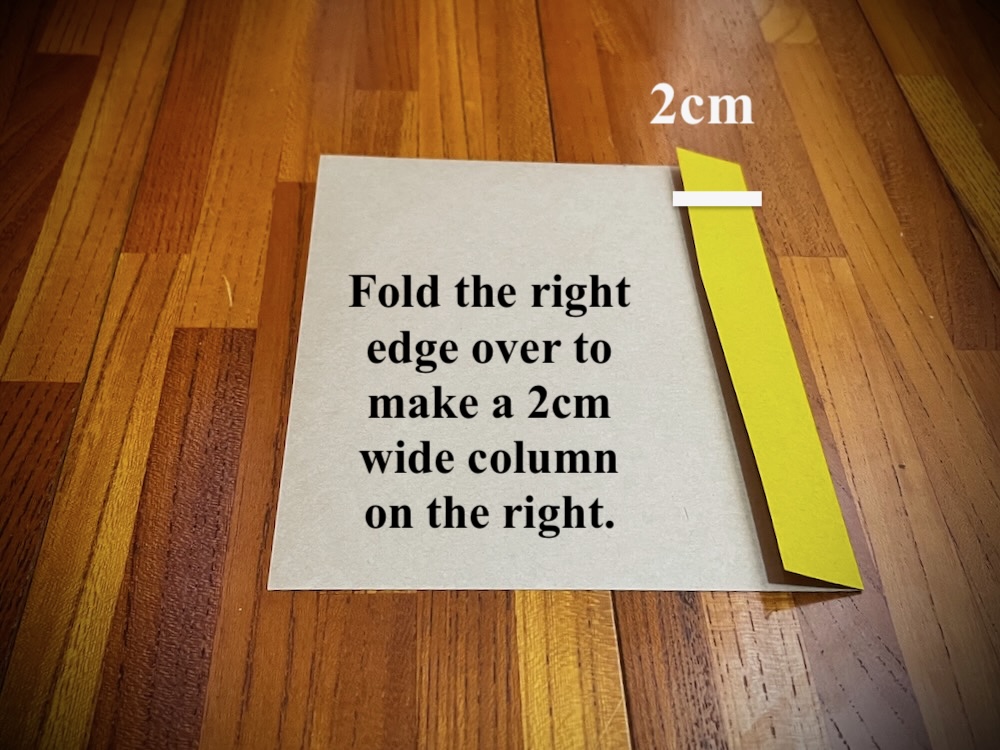
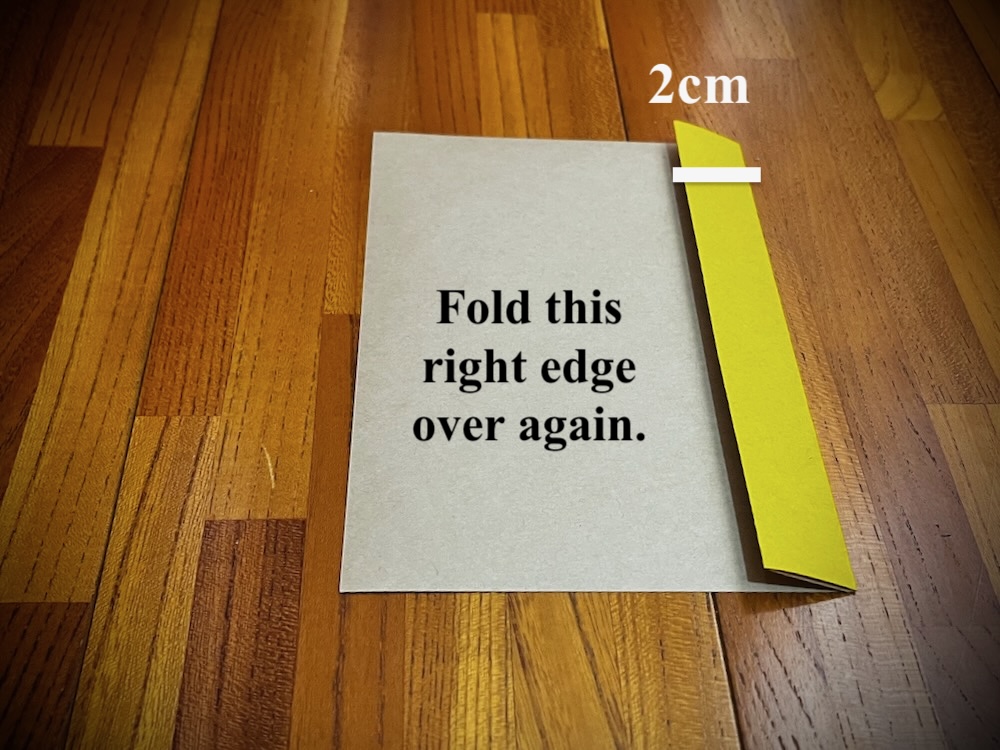
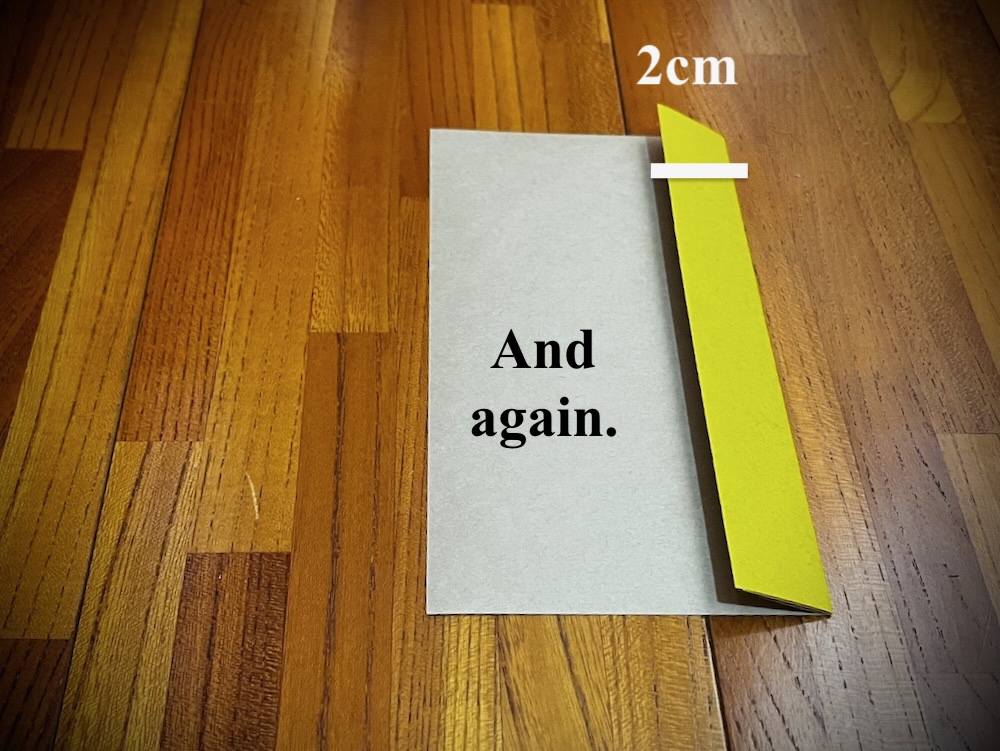
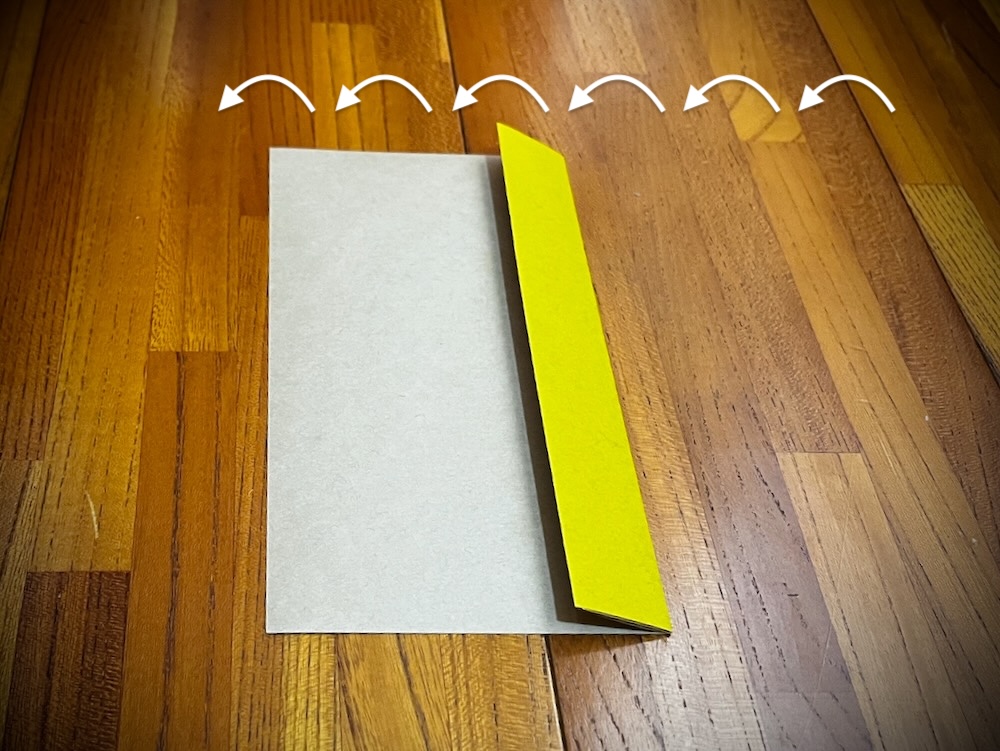
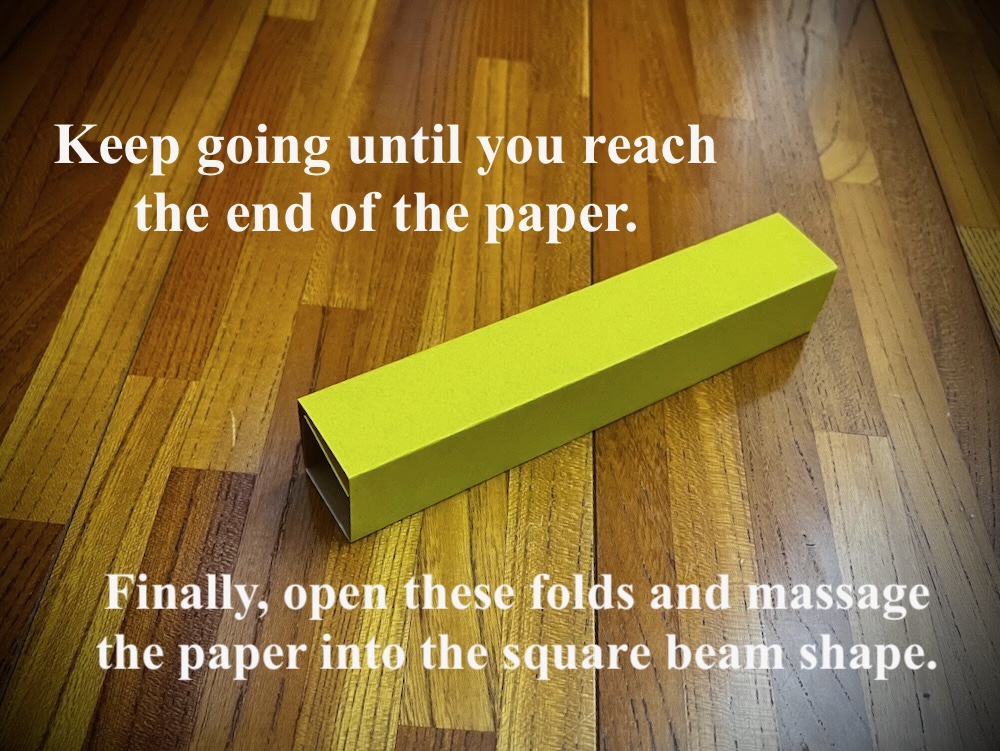
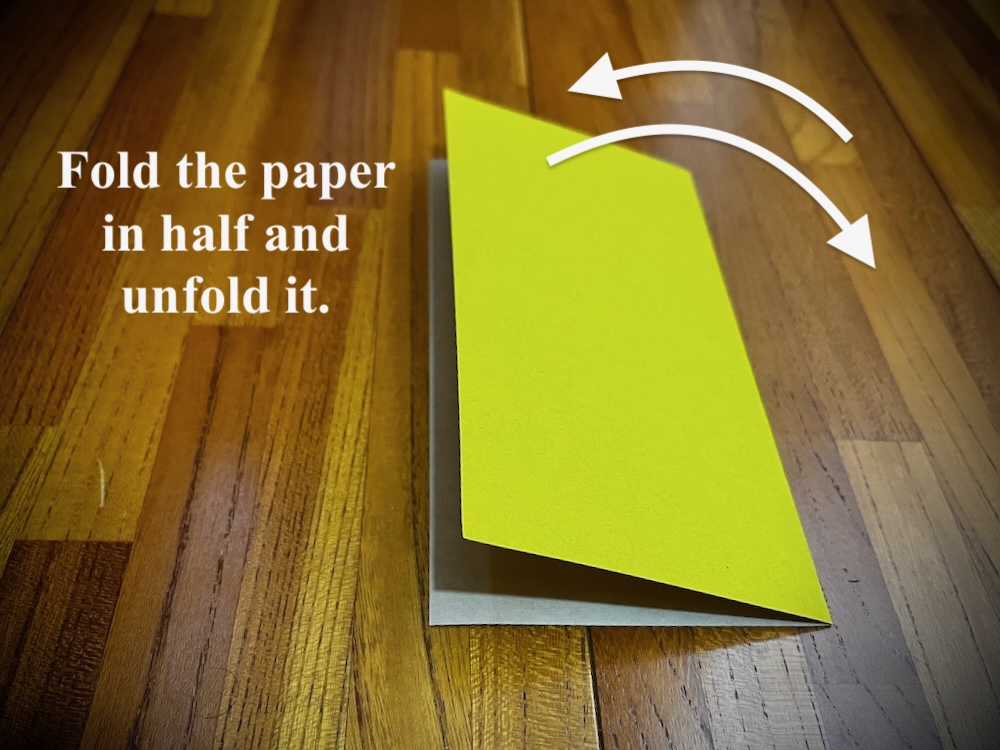
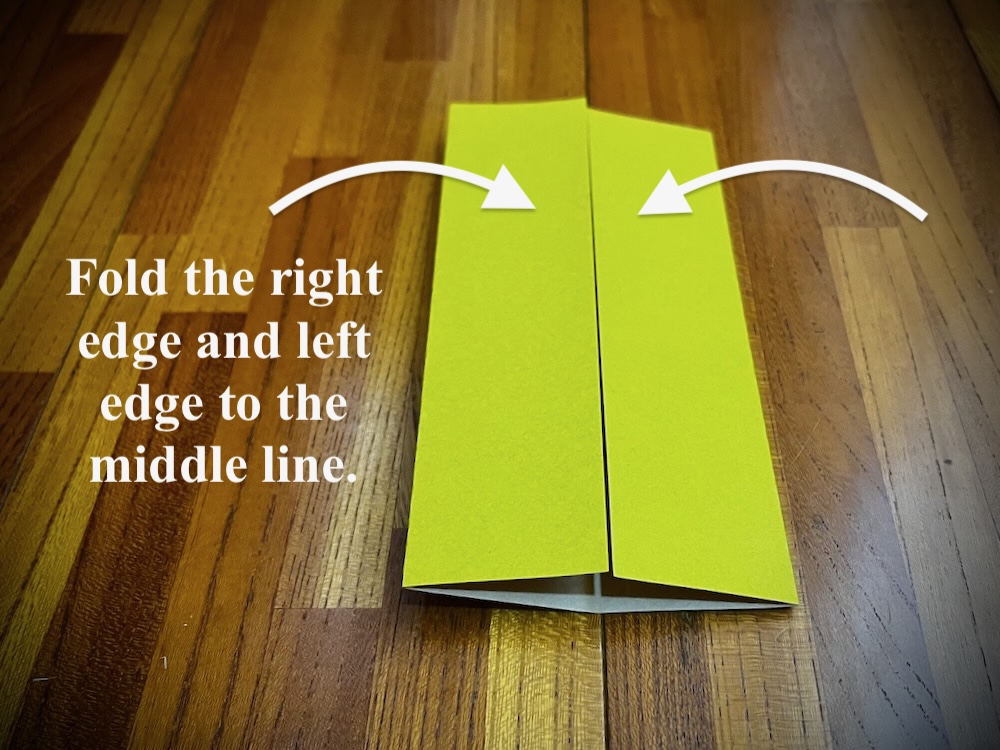
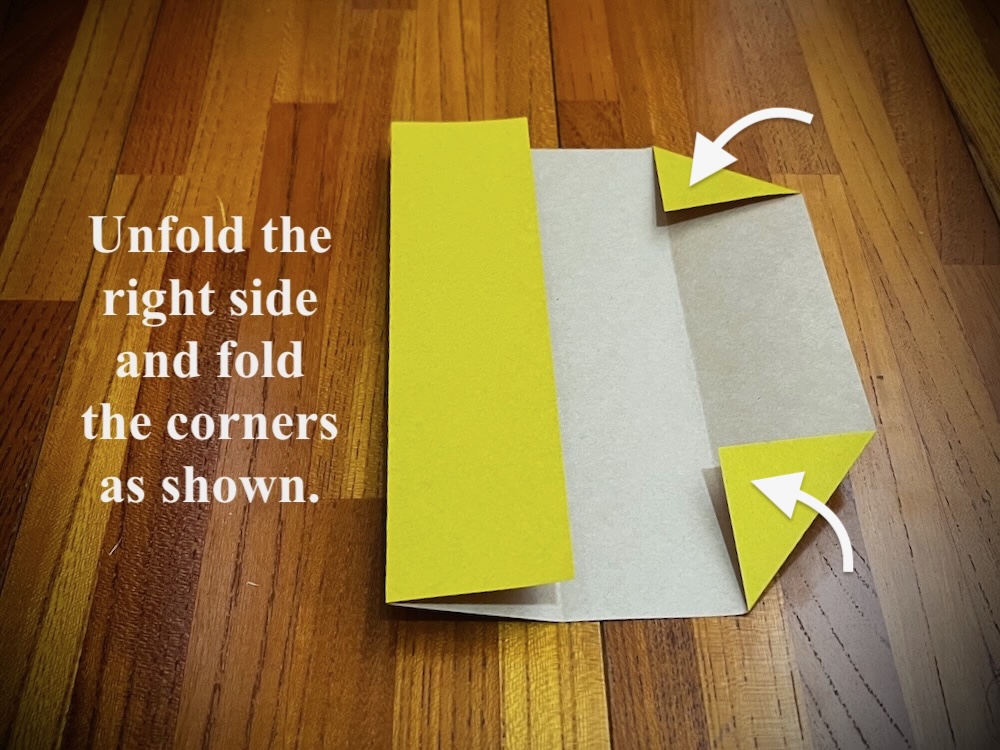
How to fold the Beams:
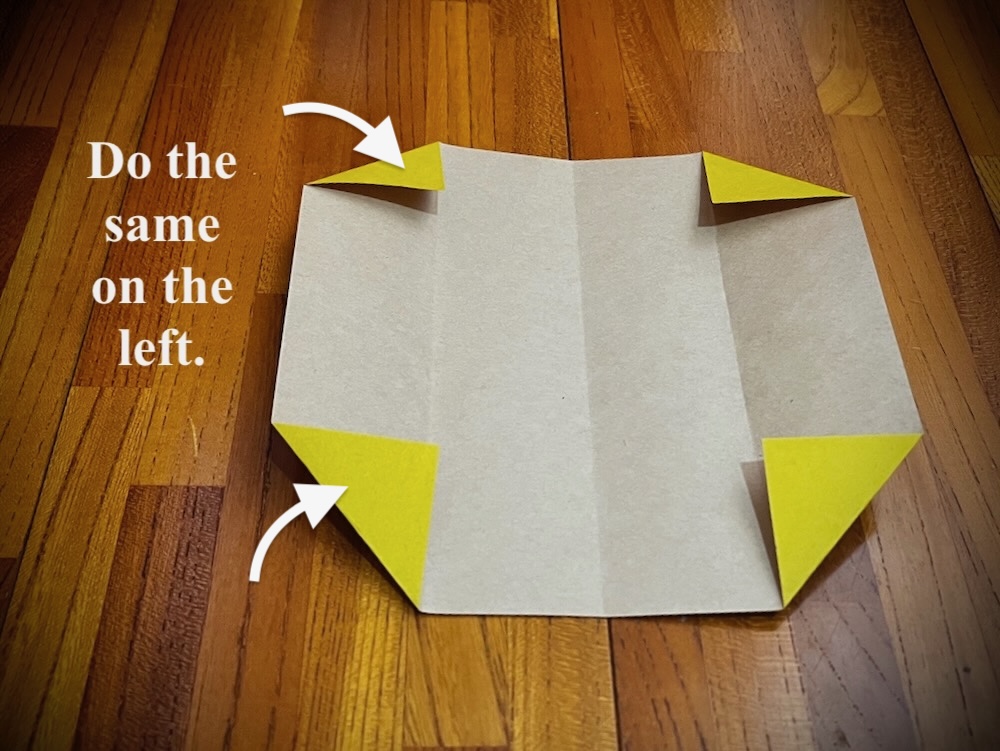
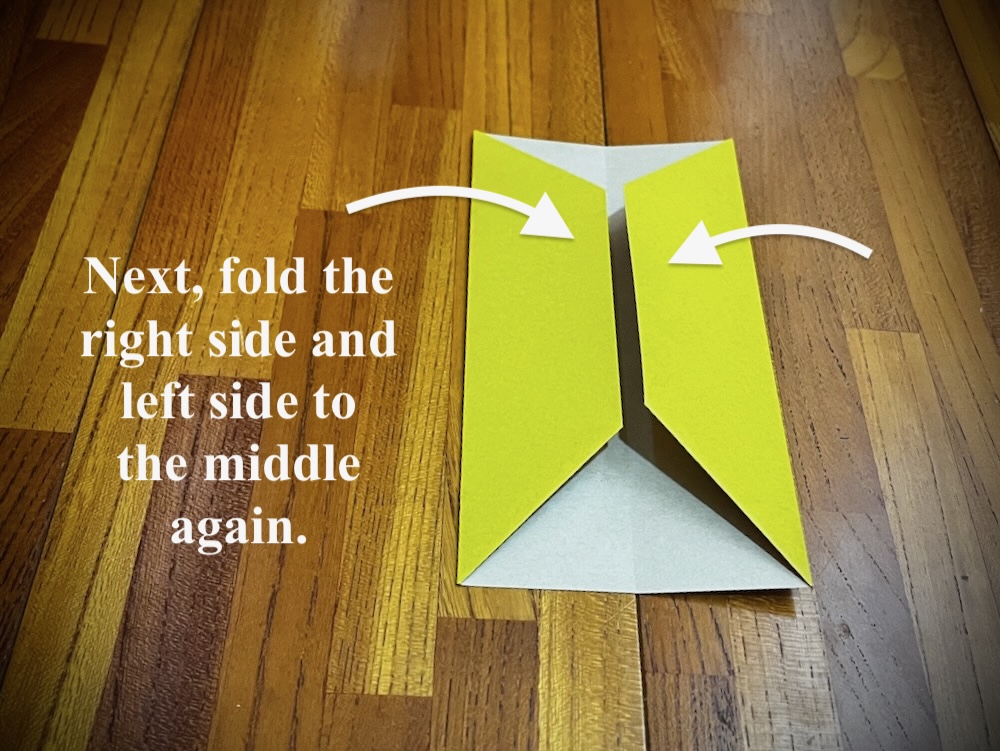
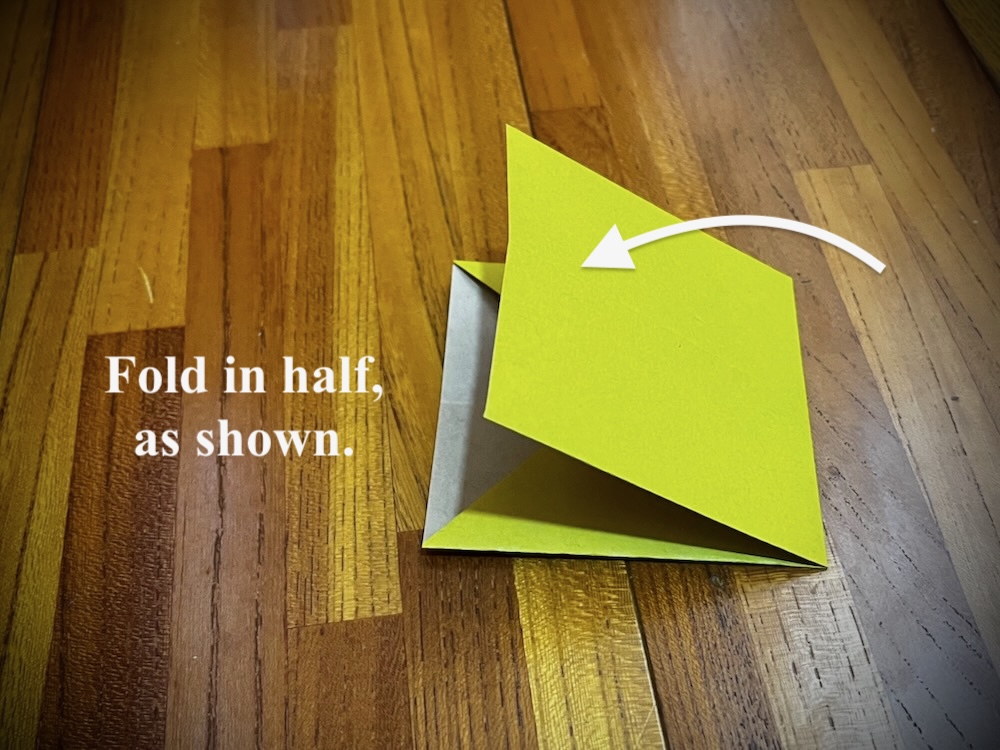
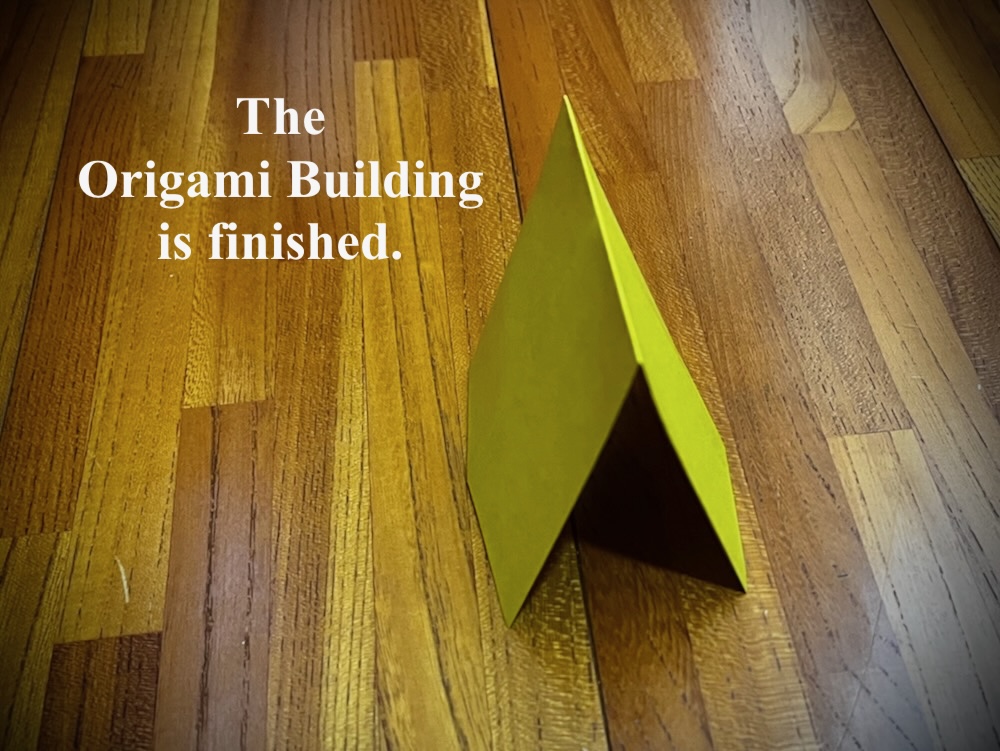
How to fold the Building:
How to fold the Balloon:
How to fold the Butterfly:
How to fold the Masu Box:
Example Vocabulary & Phrases:
| Category | Preposition / Phrase | Examples |
|---|---|---|
| Basic Positions | on | Put the red balloon on the blue box. |
| in | Place the butterfly in the yellow box. | |
| inside | Keep the red balloon inside the blue box. | |
| under / underneath | Slide the yellow beam under the building. | |
| above | Hold the butterfly above the red blanket. | |
| over | Move the blue beam over the yellow box. | |
| below | Keep the yellow beam below the blue beam. The butterfly’s tail is below the blanket on the right. | |
| at | Put the red blanket at the base of the building. | |
| Front / Back | in front of | Place the blue box in front of the building. |
| behind | Put the yellow box behind the building. | |
| Left / Right | to the left of | Put the blue beam to the left of the red blanket. |
| to the right of | Place the yellow beam to the right of the butterfly. | |
| on the left | The yellow box is on the left. | |
| on the right | The blue box is on the right. | |
| Distances | near | Put the red balloon near the butterfly. |
| far from | Move the yellow box far from the building. | |
| next to / beside | Place the blue beam next to the yellow beam. | |
| close to | Keep the butterfly close to the red blanket. | |
| a little further | Move the yellow beam a little further from the blue box. | |
| closer | Move the red balloon closer to the building. | |
| Middle / Between | between | Put the butterfly between the two boxes. |
| in the middle of | Place the red balloon in the middle of the red blanket. | |
| through | The yellow beam goes through the building. | |
| Contact / Touching | touching | The blue beam is touching the yellow beam. |
| against | Lean the yellow box against the building. | |
| Alignment / Direction | parallel to | Make the two beams parallel to each other. |
| diagonal to | Place the blue beam diagonal to the yellow box. | |
| facing | Keep the butterfly facing the building. | |
| pointing toward | Point the yellow beam toward the red balloon. | |
| Containers / Surfaces | at the edge of | Put the red blanket at the edge of the blue box. |
| on top of | Place the yellow box on top of the red blanket. | |
| underneath | Slide the red balloon underneath the yellow blanket. (← if you prefer red blanket, I can adjust) | |
| at the bottom of | Put the red balloon at the bottom of the yellow box. | |
| on its side | The building is on its side. Stand the box on its side. | |
| Quantifying Position | exactly | Place the butterfly exactly in the center of the red blanket. |
| slightly | Move the yellow beam slightly to the right of the blue beam. | |
| halfway | Put the red balloon halfway between the two beams. |
| Function | Expression |
|---|---|
| Starting an instruction | First… / Next… / Then… / Finally… |
| Directing movement | Move it… / Slide it… / Shift it… / Turn it… / Flip it over… |
| Fine adjustments | A little to the left/right… / Slightly up/down… / Just a tiny bit… |
| Clarifying | No, further. / No, back a bit. / Yes, that’s perfect. |
| Confirming | Is it okay here? / Like this? / Is this the right spot? |
| Asking the partner to do something | Can you place it…? / Could you move it…? / Please put it… |
| Correcting politely | Maybe a little higher? / Could you move it slightly? / Almost—just a bit more. |
| Describing the final goal | It should be in the center. / I want it next to the box. / Make the two beams parallel. |
| Asking for clarification | Where exactly? / How close? / Which direction? |
| Encouraging | That’s great! / Perfect. / Yes, exactly like that. |
| Level | Expression |
|---|---|
| Neutral / Polite | Please move it here. / Please hold it there. |
| Can you put it on the left? | |
| Can you place it between the two shapes? | |
| More Polite | Could you move that a little closer, please? |
| Could you place the balloon on top of the yellow beam? | |
| Would you mind moving it to the right? | |
| Very Gentle / Softening | Maybe you could move it forward a bit? |
| If possible, could you put it next to the blue box? | |
| When you have a second, can you shift it slightly to the right? |
These are excellent for real-life student interaction:
- “A little more…
Stop! Perfect.” - “Can you make them touch?”
- “Turn it until it’s parallel.”
- “Move it a tiny bit to the left.”
- “Almost—just a bit more.”
- “Line it up with this edge.”
- “Put it so the two corners match.”
- “Let’s make a triangle shape.”
- “It should be centered.”
- “Rotate it clockwise / counterclockwise.”
- “The butterfly is facing away from the building.”
- “There’s a small gap between these two.”